Flip your computer monitor vertically. It will change your life.
Get the most out of your screen real estate.
BySandra Gutierrez G.| Updated Oct 12, 2021 8:24 AM
Turn your desktop into a control center.Josh Sorenson / UnsplashSHAREWith time, monitors have grown wider and wider to give us more space and more resolution for videos and gaming. Setting up your screen horizontally may come naturally to you—that’s how it’s shown on the box anyway—but when you’re working, it might not be the most efficient option.
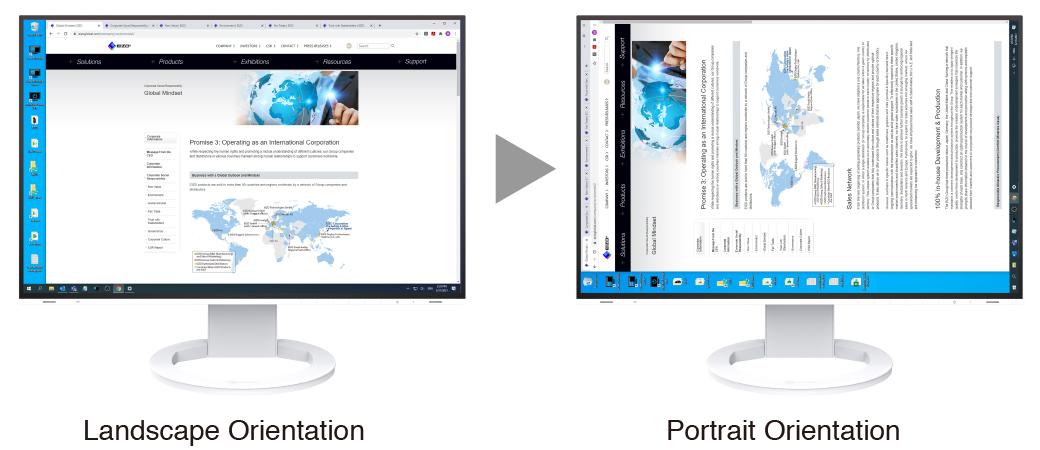
Flipping your external monitor into a vertical position is easy to do and can make more efficient use of every single inch of your screen. When you’re using programs like Microsoft Word or Google Docs, or you’re looking at traditional scroll-down webpages, there’s only so much a wider screen can do for you. It’ll come to a point when having more room only means more space between columns or a larger grey area between the document you’re working on and the scroll bar on the right.
A vertically rotated monitor will display more condensed versions of your browser, but it’ll allow you to more comfortably fit two windows on your monitor instead of one. This means that if you use a monitor as your laptop’s second screen, you’ll have immediate control over three applications or tabs at the same time.
How to set up a vertical external monitor
There are two sets of steps you’ll have to go through to set up a vertical monitor—one involving hardware, and the other involving software.

Let’s start with the first one. If you’re using your monitor with a stand, physically flipping it into a vertical position should be easy. The exact process will depend on the manufacturer, but some Dell monitors, for example, can be easily rotated into portrait mode, or have some sort of a lock on the back you press to allow screen rotation. Desk mounts are easy too, and even basic ones let you rotate your monitor however you want.
[Related: Four computer monitors to seriously upgrade your home office]
Once that’s sorted, you have to deal with the software setup. First, make sure your monitor is properly connected and set up to work with your computer. If you don’t know how to do that, here are all the instructions you need. No matter the make of your computer, the monitor you connect will be in a landscape position by default—you need to change that.
On PCs, click on the Settings icon (the cog symbol) in the Start menu, and choose System, followed by Display. There, you can configure where your monitor is relative to your laptop or your primary screen (left or right), and change it from horizontal to vertical—click Orientation and choose Portrait.
On Macs, go to the Apple menu, choose System Preferences, and then Displays. Next, select the Rotation pop-up menu, and choose 90° from the dropdown menu.
When you shouldn’t go vertical
If you work in a very compartmentalized way and use separate windows for different jobs or accounts, a vertical setup will be comfortable and help you keep everything just a glance away.
But if you prefer to keep a long row of endless tabs on your browser or need to focus on one thing at a time, a vertical monitor may be too much stimulus for you. Still, if this is your case, it’s always a good idea to keep your primary screen (be it another monitor or your laptop’s built-in display) locked on a landscape view. That way, whenever you need to concentrate, you can turn off your vertical monitor and pour all of your attention into the task at hand. When you’re finished, you can easily go back to that bird’s eye view.
Sandra Gutierrez G.Sandra Gutierrez is the Associate DIY editor at Popular Science. She makes a living by turning those “Wait, I can make that!” moments she has while browsing the internet into fully-fledged stories—and she loves that. Contact the author here.
computer setup computers DIY evergreen external monitor


