How to Record the Screen on Your Windows PC or Mac
Want to record the screen on your computer? Maybe you’re a professional who needs to capture your screen for a presentation at work, a software developer generating a how-to video, or just someone who wants to upload a helpful video clip to YouTube. Windows and macOS allow you to capture your screen activity thanks to built-in tools, though there are also many third-party screen-capture apps. Here's how to get started.
Xbox Game Bar
Built into Windows 10, Game Bar is designed to record games that you play directly on your PC or those you stream from an Xbox console. However, it can just as easily capture screen activity from other applications. To set this up, go to Settings > Gaming > Xbox Game Bar and turn on the Enable Xbox Game Bar switch.
Here, you can also change any of the keyboard shortcuts for opening the Game Bar, taking a screenshot, and recording a video. And if you connect an Xbox Controller to your PC, you can trigger the Game Bar by pressing the Xbox button on the controller.
You’ll be able to record activity in most applications and windows, except the Windows desktop, File Explorer, and certain Windows apps, such as Weather. Navigate to the screen you wish to record and press Win + G to open Game Bar. Several Game Bar widgets appear on the screen with controls for capturing screenshots, recording video and audio, and broadcasting your screen activity.
Click the Start Recording button or use the Win + Alt + R keyboard shortcut to capture your screen activity. Now perform whatever screen actions you want to capture. After you click on the screen, the Game Bar widgets vanish, replaced by a small floating bar in the upper-right corner of the screen through which you can control the recording.
To stop the recording, click the Recording button on the floating bar. Once the recording ends, a notification tells you that the game clip was recorded. Click the notification to view your video in the Game Bar. Click the Play button to play the video.
You can also access and play your video from its default location in File Explorer: C:\Users\[username]\Videos\Captures. Your videos will be stored here as an MP4 file, which can then be uploaded anywhere you like.

You can tweak the Game Bar if you go to Settings > Gaming > Captures. From here, you’re able to change the default file location for your videos, turn on background recording to capture activity after the fact, opt to record video along with your audio, and switch the frame rate between 30 and 60 frames per second.
In Game Bar itself, click the Settings icon to the right of the top bar. Browse the different categories under Settings to modify the shortcuts, change the theme, tweak the widgets, set up background recording, and record the audio with the video.
macOS Screenshot Tool
Your Mac comes with its own screen-recording feature on macOS Mojave and higher. Open the app or window you want to record and press Shift + Command + 5 to open the system’s screen-capture tool. From the bottom toolbar, you can opt to capture the entire screen, just the selected window, or a custom portion of the screen. For video, your options include recording the entire screen or a custom portion.
Click the Options button and you can choose where to save your recording and initiate a countdown timer to start the recording. Make sure to check the option to use your Mac’s microphone if you’re recording your own voice or external audio.
Click Record Entire Screen or Record Selected Portion to begin recording. A Recording button appears at the top of the screen on the menu bar. Click this button to stop recording, and a thumbnail of your recording will be added to your computer. Double-click the screen recording file to play it in your default video player.
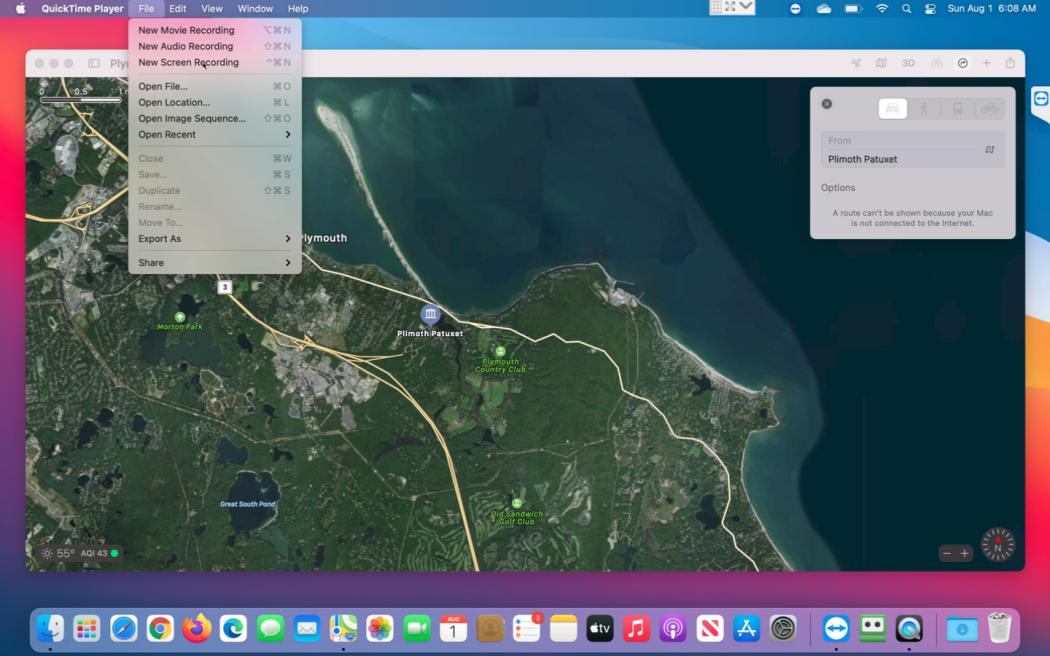
You can also trigger the screen recording directly from QuickTime on a Mac. Open QuickTime Player and then click File > New Screen Recording. The first time you do this, you’ll be asked to open System Preferences to grant QuickTime Player permission to record your screen. Go into your settings and check the box to grant the proper permissions. Start the new recording through QuickTime again, and you can then use the Mac’s recording tool.
OBS Studio
The free OBS Studio works with Windows, macOS, and Linux, and packs a lot of features into one program. Use the program’s floating control panel to start and stop your recording. Along the way, OBS Studio can record screen activity, your microphone, and computer audio. The program then saves the output as an MP4 file.
You can also stream your video live or turn to Studio Mode for adding cuts, fades, and other transitions to the video. The program offers an array of settings where you can change the format and other criteria for both the video and audio portions of the recording. OBS Studio looks intimidating at first, but you should be able to catch on and learn how to use it effectively.
Free Cam
Free Cam is an extremely basic screen recorder for Windows users, but it remains capable for most needs. This program captures your screen activity and audio, then saves your recording as a WMV file. Simply click the New Recording button, then select which area of the screen you want to capture, anything from a single window or application to the entire screen.
Click the Record button to begin the capture, then press Esc when you’re done. Your recording appears in a preview window where you can edit it, save it as a video file, or upload it directly to YouTube.
If you need to record the screen on your smartphone, we have a guide for using the built-in recorder on iPhone and iPad. We can also help you choose the right app for Android devices.
Sign up for our Weekly Apple Brief for the latest news, reviews, tips, and more delivered right to your inbox.
EmailThis newsletter may contain advertising, deals, or affiliate links. Subscribing to a newsletter indicates your consent to our Terms of Use and Privacy Policy. You may unsubscribe from the newsletters at any time.
Thanks for signing up!Your subscription has been confirmed. Keep an eye on your inbox!


