How to Turn a Windows Laptop Into a Desktop PC
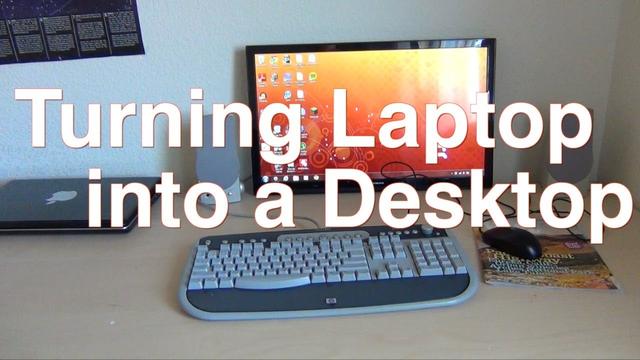
Laptops offer the power of a PC wherever you go, from the other side of the country to the other side of the couch. But sometimes you want a desktop for a bigger display, a larger keyboard, and a beefy mouse. Here’s how to turn your laptop into a pseudo desktop.
Any Laptop Can Transform Into a Desktop
Transforming your portable PC into something more permanent is easy with a few cables and the necessary peripherals. The best part is that your laptop doesn’t have to remain tethered to your workspace, and any time you need to get on the move, just disconnect the cables and you’re good to go.
Let’s go through the basics of a DIY setup to get on the road to big-screen glory.
What Do You Need From a Laptop?
The first question people often have is whether their laptop can handle driving all those peripherals, including a larger screen. The answer for most people is almost always yes. Even something as old as an Intel Sandy Bridge CPU can work. All that counts is that the PC has a solid processor with passable integrated graphics.
If you’re running a Pentium or a Celeron processor, it’s possible that you may run into some performance issues if you’re using both the laptop and the external monitor at the same time. In general, however, most laptop Intel Core and AMD Ryzen processors won’t have a problem driving an external monitor.
Identify the Ports on Your Laptop
The next step is to identify the ports that you have on your laptop. Ideally, you’d purchase a monitor that has the same kind of port so that you only have to buy one cable without an adapter.
AdvertisementThere are several port types you’re likely to run across. The most common is, of course, HDMI, which is pictured in the laptop above. The next is DisplayPort, which is commonly used on gaming displays that have a feature called FreeSync.
After that, we have DVI-D. This isn’t terribly common on laptops these days, but you’ll find that a lot of mid-range to lower-budget displays will have this port. If you end up getting a monitor with only DVI-D, you will need an adapter. Another possibility is mini DisplayPort, which isn’t that common, but you will find both laptops and monitors with it.
Finally, there’s the old standby VGA, which is the classic video connector we’ve been seeing on PCs since the ’80s. VGA is the largest of the ports you’re likely to come across and is unmistakable. There’s almost no chance that your gear is only rocking VGA, but you may find some monitors equipped with it as a secondary option. We would not recommend using VGA unless it’s the only option available.

The Display You’ll Need
The centerpiece of any laptop to desktop setup is the display. In general, try to stick with a monitor that has the same resolution as your laptop. This makes it easier for your laptop to handle and lessen any potential performance impacts.
The only exception would be anyone who has a display lower than 1080p, such as 1366-by-768. Those people should purchase a 1080p display, and the laptop should be able to use the native resolution of the external display without issue. Anyone who has at least a third-generation Core processor, a newer Ryzen processor, or a laptop with a discrete GPU, could try upgrading to a 1440p or 4K display.
AdvertisementIf you want to drive more than one external monitor, you are in very different territory, and we won’t be getting too deep into that here. For multiple external monitors, you’ll need a good laptop GPU as well as enough ports (or GPU bandwidth and a hub with enough ports) to support it.
Cables, Peripherals, and Setup
Now comes the easy part. With the laptop off, connect your display cable from your laptop to your monitor of choice, be it via HDMI, DisplayPort, DVI, or VGA. Then, from the USB ports on your laptop, connect a desktop keyboard and external mouse. If you don’t have enough USB ports, then you’ll need to use an inexpensive USB hub or a keyboard with USB passthrough.
We’re pretty much ready to get going. If you plan on using your laptop as a second display, then place it on the right or left of the external display—wherever is most comfortable for you.
For the best experience, make sure that the laptop display is at eye height. This is easy to do with a stack of books or a box. A fancier-angled laptop holder will also work, but it isn’t really necessary, since we don’t plan on using the keyboard.
Now we’re ready to fire it up. Turn on your PC, make sure that the display is powered on, and wait to see what happens. Most PCs should just automatically start using the external monitor after you sign in to Windows.
If you don’t see anything on the monitor after you log in, wait a few more minutes to be sure. Then check that the cables are inserted securely. If that doesn’t work, try to find out whether the PC is detecting the external monitor by heading to Settings > System > Display in Windows 10. Under “Multiple Displays,” click the “Detect” button.
AdvertisementIf none of these steps help, you can try other strategies, such as updating the graphics driver or reinstalling it. Any serious issues that aren’t fixed by these steps should be exceedingly rare.
Adjusting the External Monitor
Once you have your monitors set up, adjusting them is a snap. Typically, your laptop monitor is labeled 1, and your external monitor is labeled 2, and they are arranged with the laptop display to the left of the external monitor. If you have the laptop positioned to the right of the monitor, then just click and drag the monitor 1 icon in the Settings app to the right place.
Open Settings > System > Display again, and scroll down to “Multiple Displays.” Here, you can choose to duplicate the displays, extend them, or only show the desktop on one of the monitors.
Anyone looking to have a dual monitor setup usually wants to use the “Extend” option to create one big desktop. If you don’t want to use your laptop display, choose to “Show only on” the external display.
Next, we may want to adjust the external monitor’s scaling (how big the text and icons are) as well as the resolution. To do this, click on the monitor 2 icon at the top of Settings > System > Display, then scroll down to “Scale and Layout.”
Windows 10 is pretty good at choosing the correct scaling and resolution, but if they don’t look right, this is the place to tweak it. You may also need to downgrade the external monitor’s resolution if the computer isn’t performing well.
Or Try a Dock for Your Laptop
These are the basics of creating a desktop-like environment for your laptop. DIY solutions are by far the cheapest to create, although they tend to involve a fair amount of wires that need to be well organized.
AdvertisementAnother option is to look at laptop docking stations that are purpose-built to turn your laptop into a desktop. Docks can make it easier to organize, as you just connect the laptop to the station while everything else remains attached to the dock. Laptop docks are usually generic, universal devices, but some laptops may have purpose-built docks, such as Lenovo’s ThinkPad line.
In our opinion, however, a generic DIY solution without a pricey dock is the better option to go with.


