The Best iPad Tips and Tricks: How to Conquer iPadOS
Anyone familiar with the iPhone's interface will have little trouble mastering the iPad. But with Apple splitting the two devices' operating systems into iOS and iPadOS, there are now some iPad-specific functions tablet owners should know.
Why create another OS? Because there are lots of functions that only work with the larger screen. Rather than have that code taking up space on iPhones, it's only on iPads. What type of functions? Read on to learn the secrets that will make Apple's biggest touch screen even more worthwhile in your daily life.
For more, dig into our iPhone tips story, as well as the fundamentals of how to navigate an iPad without a home button and how to change the look and feel of the icons and text.
Dare to Dock
The Dock—a toolbar of apps at the bottom of the iPad screen—isn't like the one on the iPhone. You can access it even while in apps by swiping up slowly from the bottom of the screen. What's more, it has slots for permanent placement of favorite apps you access constantly (up to 13) and always has two or three slots on the far right for the most recently used apps, as well as apps you might have open on your iPhone or Mac (for use via Handoff).
Placing apps on the dock is simple: Long-press on an icon to start the Edit Home Screen option where all the icons jiggle. Drag it down to the dock and put it in the position you want. This also works with folders.
Share Your Safari Tabs Across Devices
Another way of sharing access across devices is to see the tabs you have open in the Safari browser on, say, your iPhone, also appear on iPad or Mac. You do this via iCloud Tabs. On the iPad (or iPhone) go to Settings> [your name] > iCloud and ensure Safari is switched on. Do the same on the Mac under System Preferences.
Now, if you go to Safari on the iPad and tap the Tabs button (it looks like a square box overlapping another square box) or pinch the screen, you'll see the tabs you have open on the iPad, plus a list of the tabs open on your other Apple devices at the bottom of the screen. Scroll up to see them in full. (Note: It can take a few minutes for tabs you open on one device to show up on another device; Handoff is more instantaneous.)
Split the Keyboard for Thumb Comfort
If you're used to a thumb-only experience on your iPhone, the iPad keyboard can be split in half to replicate the iOS experience.
When the keyboard is open at the bottom of the screen, long-press the keyboard key at the bottom right. Menu options include Undock (so the keyboard "floats"), Floating (so you get a mini iPhone-sized keyboard you can put anywhere on the screen), and Split (pictured above).To undo, long-press again and select Merge or pinch outward with two fingers.
On any of these keyboards, you can still hold down a finger on the space bar to turn the whole keyboard into a trackpad, so you can place a cursor anywhere for typing.
Swipe Down for Punctuation and Symbols
Notice that each letter on the keyboard also has a corresponding symbol over top of the letter, in gray. Those are the symbols, punctuation, or numbers you get if you hit the shift key on either side of the space bar. But you don't have to shift. Just swipe down quickly on the individual key. For example, tap the E key to get an E, but swipe down on it and you get a 3.

Otherwise, tap the .?123 button for those symbols, plus a new set of symbols you can swipe to get (swipe the # key to get £, for example). Double-tap the shift button for caps lock.
Take Multitask to Task
Opening a Slide Over window.Arguably, the most important thing that sets iPadOS apart from iOS is the ability to multitask, or having more than one app open at a time (though picture-in-picture mode does work on iPhone with iOS 14). You do this either with a Slide Over (shown above), where one app sits atop another, or a Split View, where two apps are side by side, making it easy to copy data back and forth between them.
Switching between Slide Over windows.First, make sure Multitasking is turned on under Settings > Home Screen & Dock > Multitasking. To open a Slide Over app, open the dock by slowly sliding your finger up from the bottom of the screen (just enough to bring it up, not enough to go into the app-switching mode). Hold your finger on the app you want to launch and drag it up to the left or right. To switch between Slide Over windows, swipe up from the bottom of the Slide Over window.
For a side-by-side Split View, do the same thing as above, but then hold the top of the Slide Over window and drag it down slightly right (or left, depending on where you want it). You can have two of the same app in Split View, such as two instances of the Safari browser.
A Slide Over window atop a Split View window.Want a third app active? Drag up a Slide Over app on top of your two Split View apps.
Note that not all apps support Slide Over and Split View. For more details on how to make this work, read How to Use Multitasking on Your iPad.
Drag and Drop Between Apps
The glorious thing about the multitasking option is the ability to drag and drop text or other info between apps. Copy and paste is so 2019.
Set up Split View window with Safari next to Notes, for example, and you can copy text (hold a finger to select a word, then drag to select more) and URLs. It also works with pictures. For example, the Photos app next to Mail, Messages, or Notes lets you drag and drop your memorable digital imagery for sharing or saving in a whole new context. The video above from Apple Support shows how you can even drag multiple photos (you'll need multiple fingers).
Dragging a photo from a PCMag story to the Notes app in Split View.You're not limited to drag and drop within a Split View or Slide Over app—but they make it easier. This "old-fashioned" way has been around since iOS 11. Hold a finger down on an item to copy/drag (like a phone number from the Contacts app). With your other hand, slide up from the bottom of the screen to get the dock. Then drag the copied/dragged item atop an icon in the dock (like the Mail app). Keep a finger on it until the app opens, then lift your finger to drop. You can also see that in the video (starting at 1:07).
Of course, not every app will support drag and drop. You may need to experiment. But beyond the apps created by Apple, you'll find support for it in Google Docs, Chrome, Annotable, Twitter, Evernote, AirMail, Bear, and more.
Shoot the Screen
Sometimes you need to take a screenshot of what's happening on an iPad for sharing or posterity. For a still image, it's easy. If your iPad has a Home button, press it and the sleep/wake button simultaneously. If you don't have a home button, press Power and Volume up simultaneously. If you have an Apple Pencil stylus, swipe up from the bottom corner. You can annotate an image after you take it (which is a lot easier with the Apple Pencil, of course). Save it and it goes in your Photos gallery.
iOS and iPadOS also allow full-screen recording now, for videos of what's happening on screen. For more, read How to Record the Screen of Your iPhone or iPad.
Guide Access to One App Only
Got a kid who wants to play with a single app on your phone, but always ends up somehow sending your boss an email? Lock them into that app with Guided Access.
Turn it on in Settings > Accessibility > Guided Access. Once on, open the app for the kid, triple tap your Sleep/Wake button (or Home button, if you have one) and you'll either start Guided Access or get a menu of Accessibility Shortcuts, if you have more than one feature turned on. Then, the only app accessible is the one that was running. No swiping up or down to get Notifications, Control Center, or other apps. You'll have to triple tap again to turn it off. Note: This makes you set up a passcode that is specific to the session, which isn't necessarily the passcode you use for your iPad overall, unless you specify that.
Mouse Around
Apple has a laptop. But if you use your iPad like one, it helps to be able to use a mouse or trackpad. Which is entirely possible now. Take an unpaired Bluetooth-capable pointing device, pair it to the iPad via Settings > Bluetooth, and begin moving the cursor. It's not really a cursor, but actually a circular dot, and you're really using the mouse like a virtual fingertip. Scroll wheels will do things like show the search panel as well as scroll through pages. You can learn a lot more by reading How to Use a Mouse With iPadOS
Be a Second Display
Adding a mouse to an iPad is fun. Adding an iPad to your computer—be it a Mac or Windows-based PC—is incredible because it turns the iPad into a second (or third or fourth) screen. On the Mac (with macOS Catalina or higher), this feature is known as SideCar, and you can do it over USB or even wirelessly, as long as both devices are logged into the same Apple ID. You'll use AirPlay to make it happen.
Windows and Android users will need a third-party app, but it's pretty easy. Read How to Use Your iPad as a Second Monitor on Any Computer for the instructions.
Widget Up Your iPad
With iPadOS, Apple has embraced widgets on its tablet. Dubbed Today View, these quick glances at information from favorites apps are accessible when you swipe right from the left edge of the Home screen or the lock screen. To pin Today View to your Home screen (in landscape mode), long-press on your screen until it enters edit mode (the apps will jiggle) and toggle Keep on Home Screen to on.
Recommended by Our Editors
Hidden iPhone Tips and Tricks to Make You an iOS ProApple iPadOS 14 ReviewApple Gives the iPad Some Love: The Coolest Features in iPadOS 15To edit widgets, swipe up and tap Edit. Delete anything you don't want. To add more, swipe up, tap Edit, and tap the plus button on the top left for widget options.
Coming to iPadOS 15 will be the ability to place widgets on any page you want in any spot, just like with iPhone. You'll also find new widgets for Apple apps like Contacts, App Store, and Find My, to name a few.
Find My...Lost iPad
Finding a lost iPad is easy with the Find My app, if you have another Apple device, or can borrow one. Sign in with the same Apple ID used on the iPad. You'll see it trying to find friends first, but click the Devices icon at the bottom to locate your Apple equipment. Click on the missing iPad itself to narrow the search to its last known location.
Options like playing a sound on the iPad may help you track it if it's nearby. You can also hit Mark As Lost so the device in question gets locked down enough that someone finding it can't access personal info; all they get is a lock screen telling them to return it. The nuclear option is to hit Erase This Device so nothing on it falls into the wrong hands, even if the iPad itself won't be coming back to you.
Note, you have to have already connected the iPad to your Apple ID before it gets lost/stolen for any of this to work. And even that's not a guarantee. For more, read this guide.
Stay in the Picture With Center Stage
A feature unique to the iPad Pro 12.9-inch (5th generation) or iPad Pro 11-inch (3rd generation) is the ability of the front-facing 12-megapixel Ultra Wide camera with 122-degree field of view to keep you centered in the frame during FaceTime video calls. You can activate or deactivate it in Settings > FaceTime > Center Stage, or swipe up from the bottom during a call and activate it on the fly. It'll keep you centered or zoom in and out as other people come on camera.
Pair With a Pencil
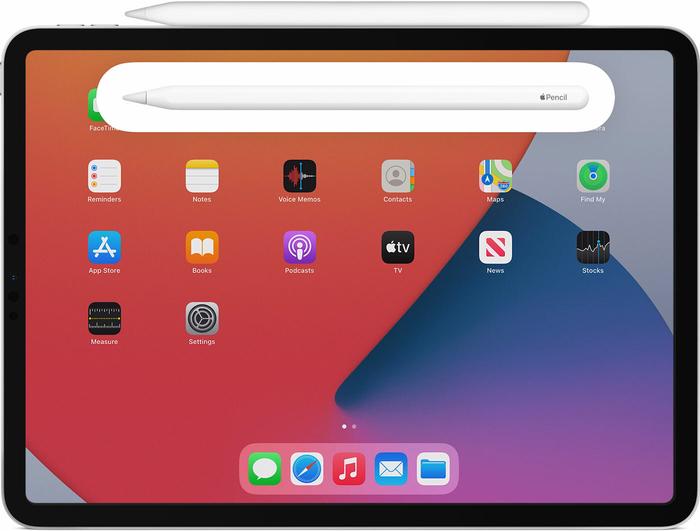
The 2nd generation Apple Pencil is one of those rare products to earn five out of five stars from PCMag. It's practically perfect in every way, despite its $129 price tag. It only works with select iPads—iPad Pro 12.9-inch (3rd, 4th, and 5th generation), iPad Pro 11-inch (1st, 2nd, and 3rd generation), and iPad Air (4th generation)—so make sure yours is compatible. But it charges while magnetically attached to the iPad. Simply attach the Apple Pencil to the side via the magnet. You may want to make sure Bluetooth is turned on.
Scribble Your Name
Scribble is what Apple calls its support for handwriting-to-text, specifically when done with the Apple Pencil. It's supported in most apps, especially those made by Apple, like the Notes app. But it's also available in any text field you encounter, so as you move along on the web or elsewhere on an iPad, you can use the Pencil to write in answers on forms and fields that are automatically converted to readable text.
Change the Pencil Double-Tap
Double tapping the 2nd gen Apple Pencil on an iPad will switch you back to the last tool you used. But you can switch that via Settings > Apple Pencil on the iPad. Then you can pick if it switches from tool to eraser, tool to last used, or shows off the color palette.
Access Locked Notes via Pencil
If you've got an Apple Pencil, this is a slick trick for quick notes. Double-tap the lock screen on the iPad, and you get the option to create a brand new note (or access your most recent note) without unlocking. You have to turn it on under Settings > Notes > Access Notes from Lock Screen. This also sets what you get when you click the Notes icon in the Control Center without unlocking first, so it also works on iPhone.
Draw Perfection with Pencil
If you are using an Apple Pencil to draw a geometric shape, all without lifting the Pencil, pause at the end, leaving the tip on the screen. Your sketchy, stretchy imperfect shape will quickly be replaced by a perfect rendition. Shape recognition supports the following shapes: line, curve, square, rectangle, circle, oval, heart, triangle, star, cloud, pentagon, thought bubble, outlined arrow, continuous line with 90-degree turns, line with an arrow at end, and a curve with an arrow at the end. Layer them or angle them so a square looks like a diamond, and write words inside them as you see fit.
Turn Anything Printable Into a PDF
Need a quick way to create a PDF, or just want to save some items for reading later on any device? Make a PDF that'll last forever. While looking at what you want to save to PDF, click the Share icon (the box with an arrow pointing up), and select Print in the share sheet (it has a black and white icon. But do not select a printer. Scroll to the preview image and pinch and zoom out on the thumbnail image. You'll now get a new Share icon at the top that allows you to save the PDF to a place like Files, Dropbox; or the Notes app; or email it, AirDrop it, or send it via Messages, Slack, Signal, etc. You can even send it to your Kindle app library for later reading.
Coming Soon in iPadOS 15
The future of iPadOS—version 15—has some cool new features. Check them all out ahead of their expected arrival next month.
Apple Fan?
Sign up for our Weekly Apple Brief for the latest news, reviews, tips, and more delivered right to your inbox.
EmailThis newsletter may contain advertising, deals, or affiliate links. Subscribing to a newsletter indicates your consent to our Terms of Use and Privacy Policy. You may unsubscribe from the newsletters at any time.
Thanks for signing up!Your subscription has been confirmed. Keep an eye on your inbox!


